November 17, 2025
Installing Pallet Racking: A Step-by-Step 3D Guide for a Safer, Smarter Warehouse Setup
.png)

If you’ve ever walked into a warehouse mid-setup, you know the chaos of beams, bolts, and frames scattered across the floor. During the setup, installing pallet racking may look straightforward, but one uneven base or missing brace can create safety risks and wasted hours. So, whether you’re a warehouse manager or a small business owner, knowing how to assemble pallet racking properly saves time, money, and frustration.
In this guide, we’ll go through each step, share a few practical tips, and show how 3D assembly manuals make even complex builds easy to follow. Moreover, you’ll also learn how to assemble pallet racking with clarity, safety, and confidence (no guesswork required). So, let’s start by understanding what makes a strong pallet racking foundation.
Before you grab a wrench, let’s clear something up: pallet racking isn’t just industrial furniture. It’s the backbone of your warehouse workflow. So, when installing pallet racking, stability and alignment decide how safely you can store tons of inventory.
Indeed, a rushed setup often leads to uneven loads, collapsed racks, or restricted access. However, we know that the goal isn’t just to “get it up”; it’s to make it last. Undeniably, a well-installed system boosts space efficiency and keeps your staff safe.
A short while ago, one of our clients, a warehouse manager, once told us how one misplaced baseplate caused a full day of delay. A 30-second oversight that caused so much trouble. So, that’s how fragile a rushed job can be.
Now that you have seen why the groundwork matters, let’s roll up our sleeves and start with the basics: tools and preparation.
Undeniably, every successful project begins with preparation. So, before installing pallet racking, make sure your tools and workspace are ready. Initially, you’ll need:
Moving forward, you should start by inspecting the floor. It must be flat, clean, and crack-free. Because uneven flooring causes misalignment, which weakens the structure over time. Mark out your racking layout with chalk or tape to visualize spacing between aisles and posts.
A quick tip: Always check manufacturer specifications before drilling. Even small differences in beam length can affect your spacing.
Once your site and tools are ready, you’re set for the next phase; that includes assembling the base and frames.
Without a doubt, here’s where the real work begins. Indeed, installing pallet racking follows a simple pattern:
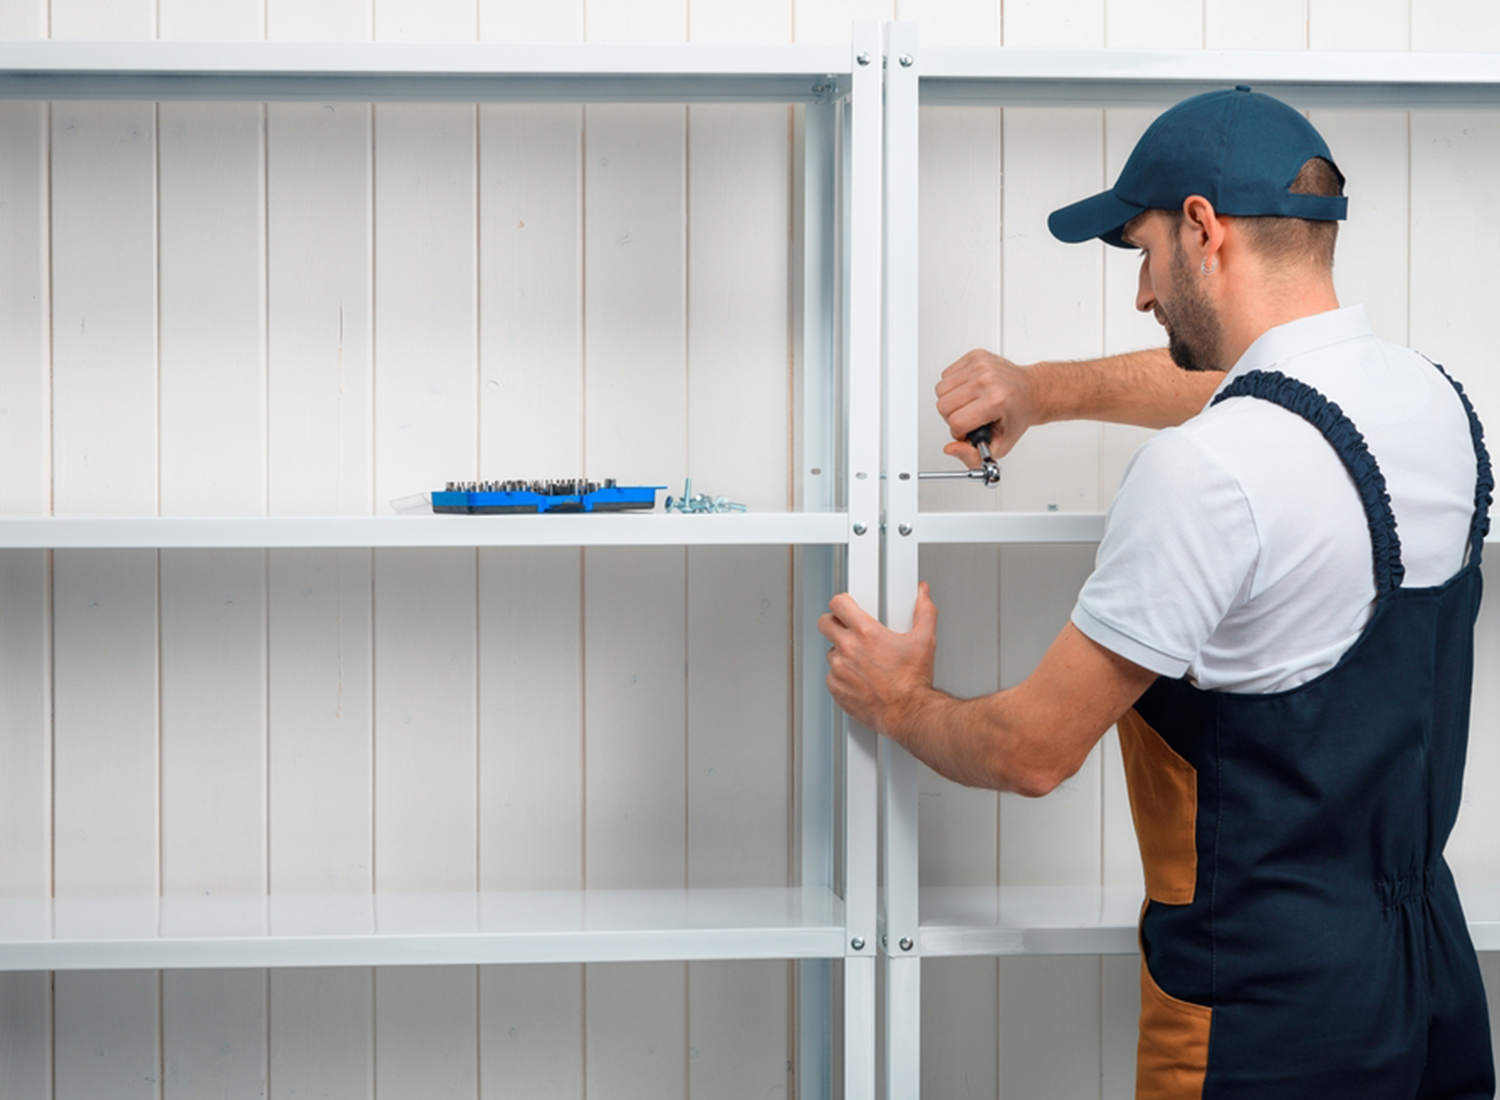
First, lay out your upright frames on the ground. Start by connecting horizontal and diagonal braces using bolts. Moreover, tighten lightly first; you can adjust later once everything stands.
Moving forward, to set the foundation, stand the first two uprights, align them using a level, and anchor to the floor using expansion bolts.
Then, install load beams by inserting them into the upright slots. Use locking pins or safety clips to prevent movement.
Lastly, after beams are secured, lay wire decks across them to support pallets evenly.
Finally, give every bolt a final torque check and confirm vertical alignment from top to base. Undeniably, installing pallet racking takes patience, not brute force. Therefore, once you’ve locked the final beam, your structure should feel firm; no sway or uneven gaps.
Now, we’ll look at a few advanced techniques to ensure lasting safety and performance.
{{furniture}}
You’ve finished installing pallet racking, but the job isn’t done until it passes safety checks. So, you should start by verifying that all frames are vertical and evenly anchored. Initially, use a plumb line or laser level for accuracy.
Next, perform a load test: begin with a light load and gradually increase to the rated capacity. This step confirms both stability and weight distribution. Moreover, keep a maintenance log noting installation date, materials used, and torque readings. It might sound tedious, but in an inspection, those notes speak volumes about your professionalism.
Moving forward, once you’ve confirmed safety, it’s time to talk about how technology is reshaping the way we build, assemble, and maintain racking systems.
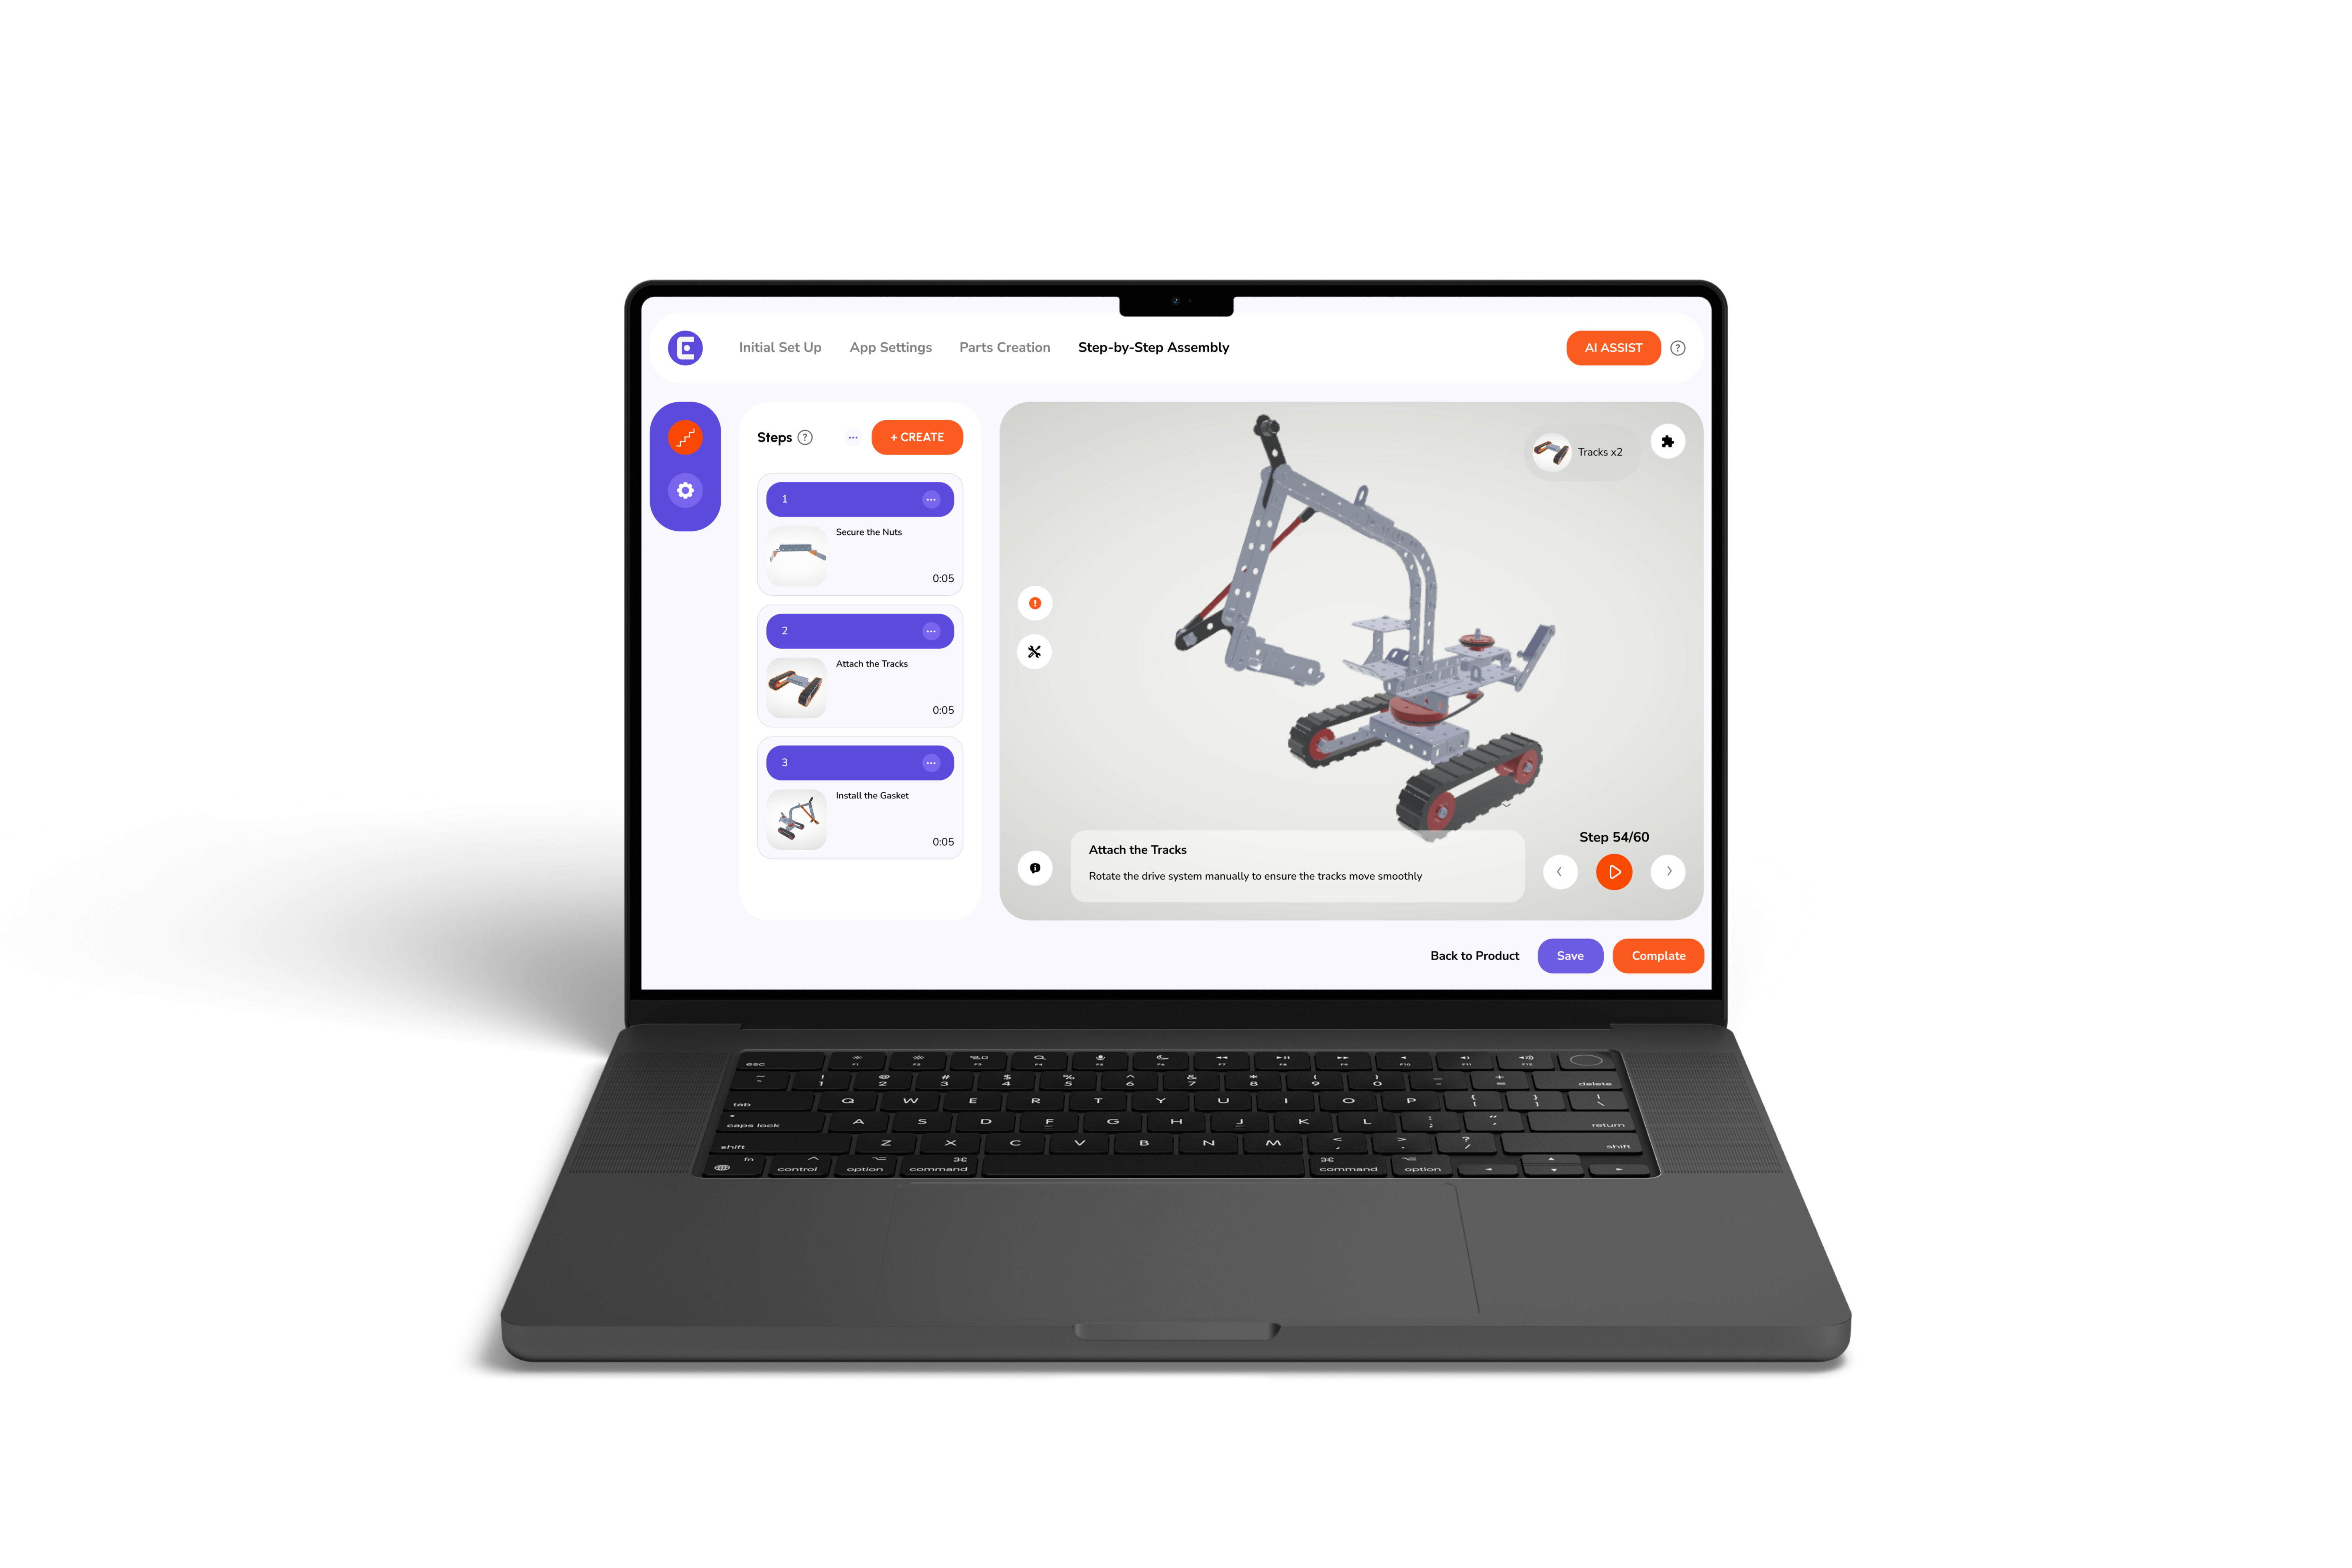
Undeniably, the rise of modular construction have changed how we think about industrial installations. Instead of flipping through thick paper manuals, workers now rely on step-by-step 3D pallet racking instructions that show every move visually.
Moreover, tools like Easemble’s 3D animations feature make installing pallet racking almost effortless. You can rotate, zoom, and even highlight parts to see exactly where each beam fits. Undoubtedly, it’s like having an expert supervisor on your screen.
Furthermore, many installers also use digital 3D construction assembly guides to ensure consistent results across multiple sites. Whether it’s a single rack or a large warehouse, having a visual guide to pallet racking means fewer errors and faster setup.
Soon, you’ll see this approach expand to everything from “How to assemble metal shelving boltless systems” to “Warehouse pallet racks” and even furniture.
So, how does Easemble tie into all this innovation? Let’s explore.
At Easemble, we’re helping businesses move beyond old paper manuals. Our platform converts 3D models into fully interactive digital manuals that customers can follow in real time.
So, if you’re a warehouse equipment supplier or manufacturer, our service can transform your assembly instructions (whether it’s for deck installation or pergola installation) into engaging, error-free visual guides.
So, by using Easemble, pallet racking brands can send their products with an easy to assemble pallet racking in 3D manual guide rather than bulky printouts. The result? Happier customers, fewer returns, and faster assembly times.
Now, let’s tackle a few quick questions most people have when setting up pallet racking systems.
{{furniture}}
In summary, installing pallet racking is both a craft and a responsibility. Done right, it transforms empty space into an efficient, safe storage system that serves you for years. Indeed, from careful floor prep to final tightening, each step builds toward reliability.
But as the future of construction leans digital, why stay stuck with static manuals? Easemble’s 3D interactive manuals bring clarity, speed, and confidence to every project whether it’s your 1st rack or your 50th.
So, are you ready to see how Easemble can make your assembly guides truly interactive? Contact our team today and turn your product manuals into living, 3D experiences that your customers will actually enjoy following.
For a small warehouse, it can take 4–6 hours. In contrast, larger systems may take several days depending on the number of racks and crew size.
Well, you can DIY, but having a certified installer ensures compliance with safety codes.
Warehouse racks cover various storage systems, while warehouse pallet racks are designed specifically for pallets.
Inspect every 6 months or after any collision or modification.
Only if they pass a safety inspection. However, bent or rusted parts reduce strength and safety.