October 23, 2025
How to Assemble a Pool Table at Home: A Step-by-Step 3D Setup Guide
.png)

Assembling a pool table may seem challenging at first, but with proper knowledge and the right steps, you can have it ready to play much faster than you’d expect. However, a correctly installed table empowers homeowners to add entertainment to any space, regardless of size or setting. Whether you are a pro or a beginner, you will always need help to assemble a pool table with 3D instructions. In this blog, we will discuss how to properly assemble a pool table using today's digital tools, enabling smooth gameplay and lasting performance along with a step-by-step 3D guide.
To assemble a pool table, you need to understand that success lies in personalization and winning within your budget. But before jumping into the process, it is always recommended to understand why the right pool table installation approach matters; however, by properly leveling, securing the frame alignment, and accurately placing your shots. Moreover, by following a reliable DIY pool table setup, you cannot just value your investment but also enhance your playing experience.
For the frame and legs, you can choose from kiln-dried hardwood like oak, maple, or poplar, which provides structural integrity, or you can opt for plywood to stay within budget. Moreover, you will need a slate that provides a professional standard while being dense, flat, and resilient. Thus, they are heavy and expensive, yet they are a perfect substitute for DIYers. Furthermore, high-quality rubber cushions provide a smooth bounce, and high-grade wool or nylon ensures smooth ball movement. Also, there are various table sizes to choose from, so you can select a color to match your decor and create a perfect setup. Once you have all the material, you can now assemble a pool table with 3D instructions. Additionally, you may also need tools like:
{{sports}}
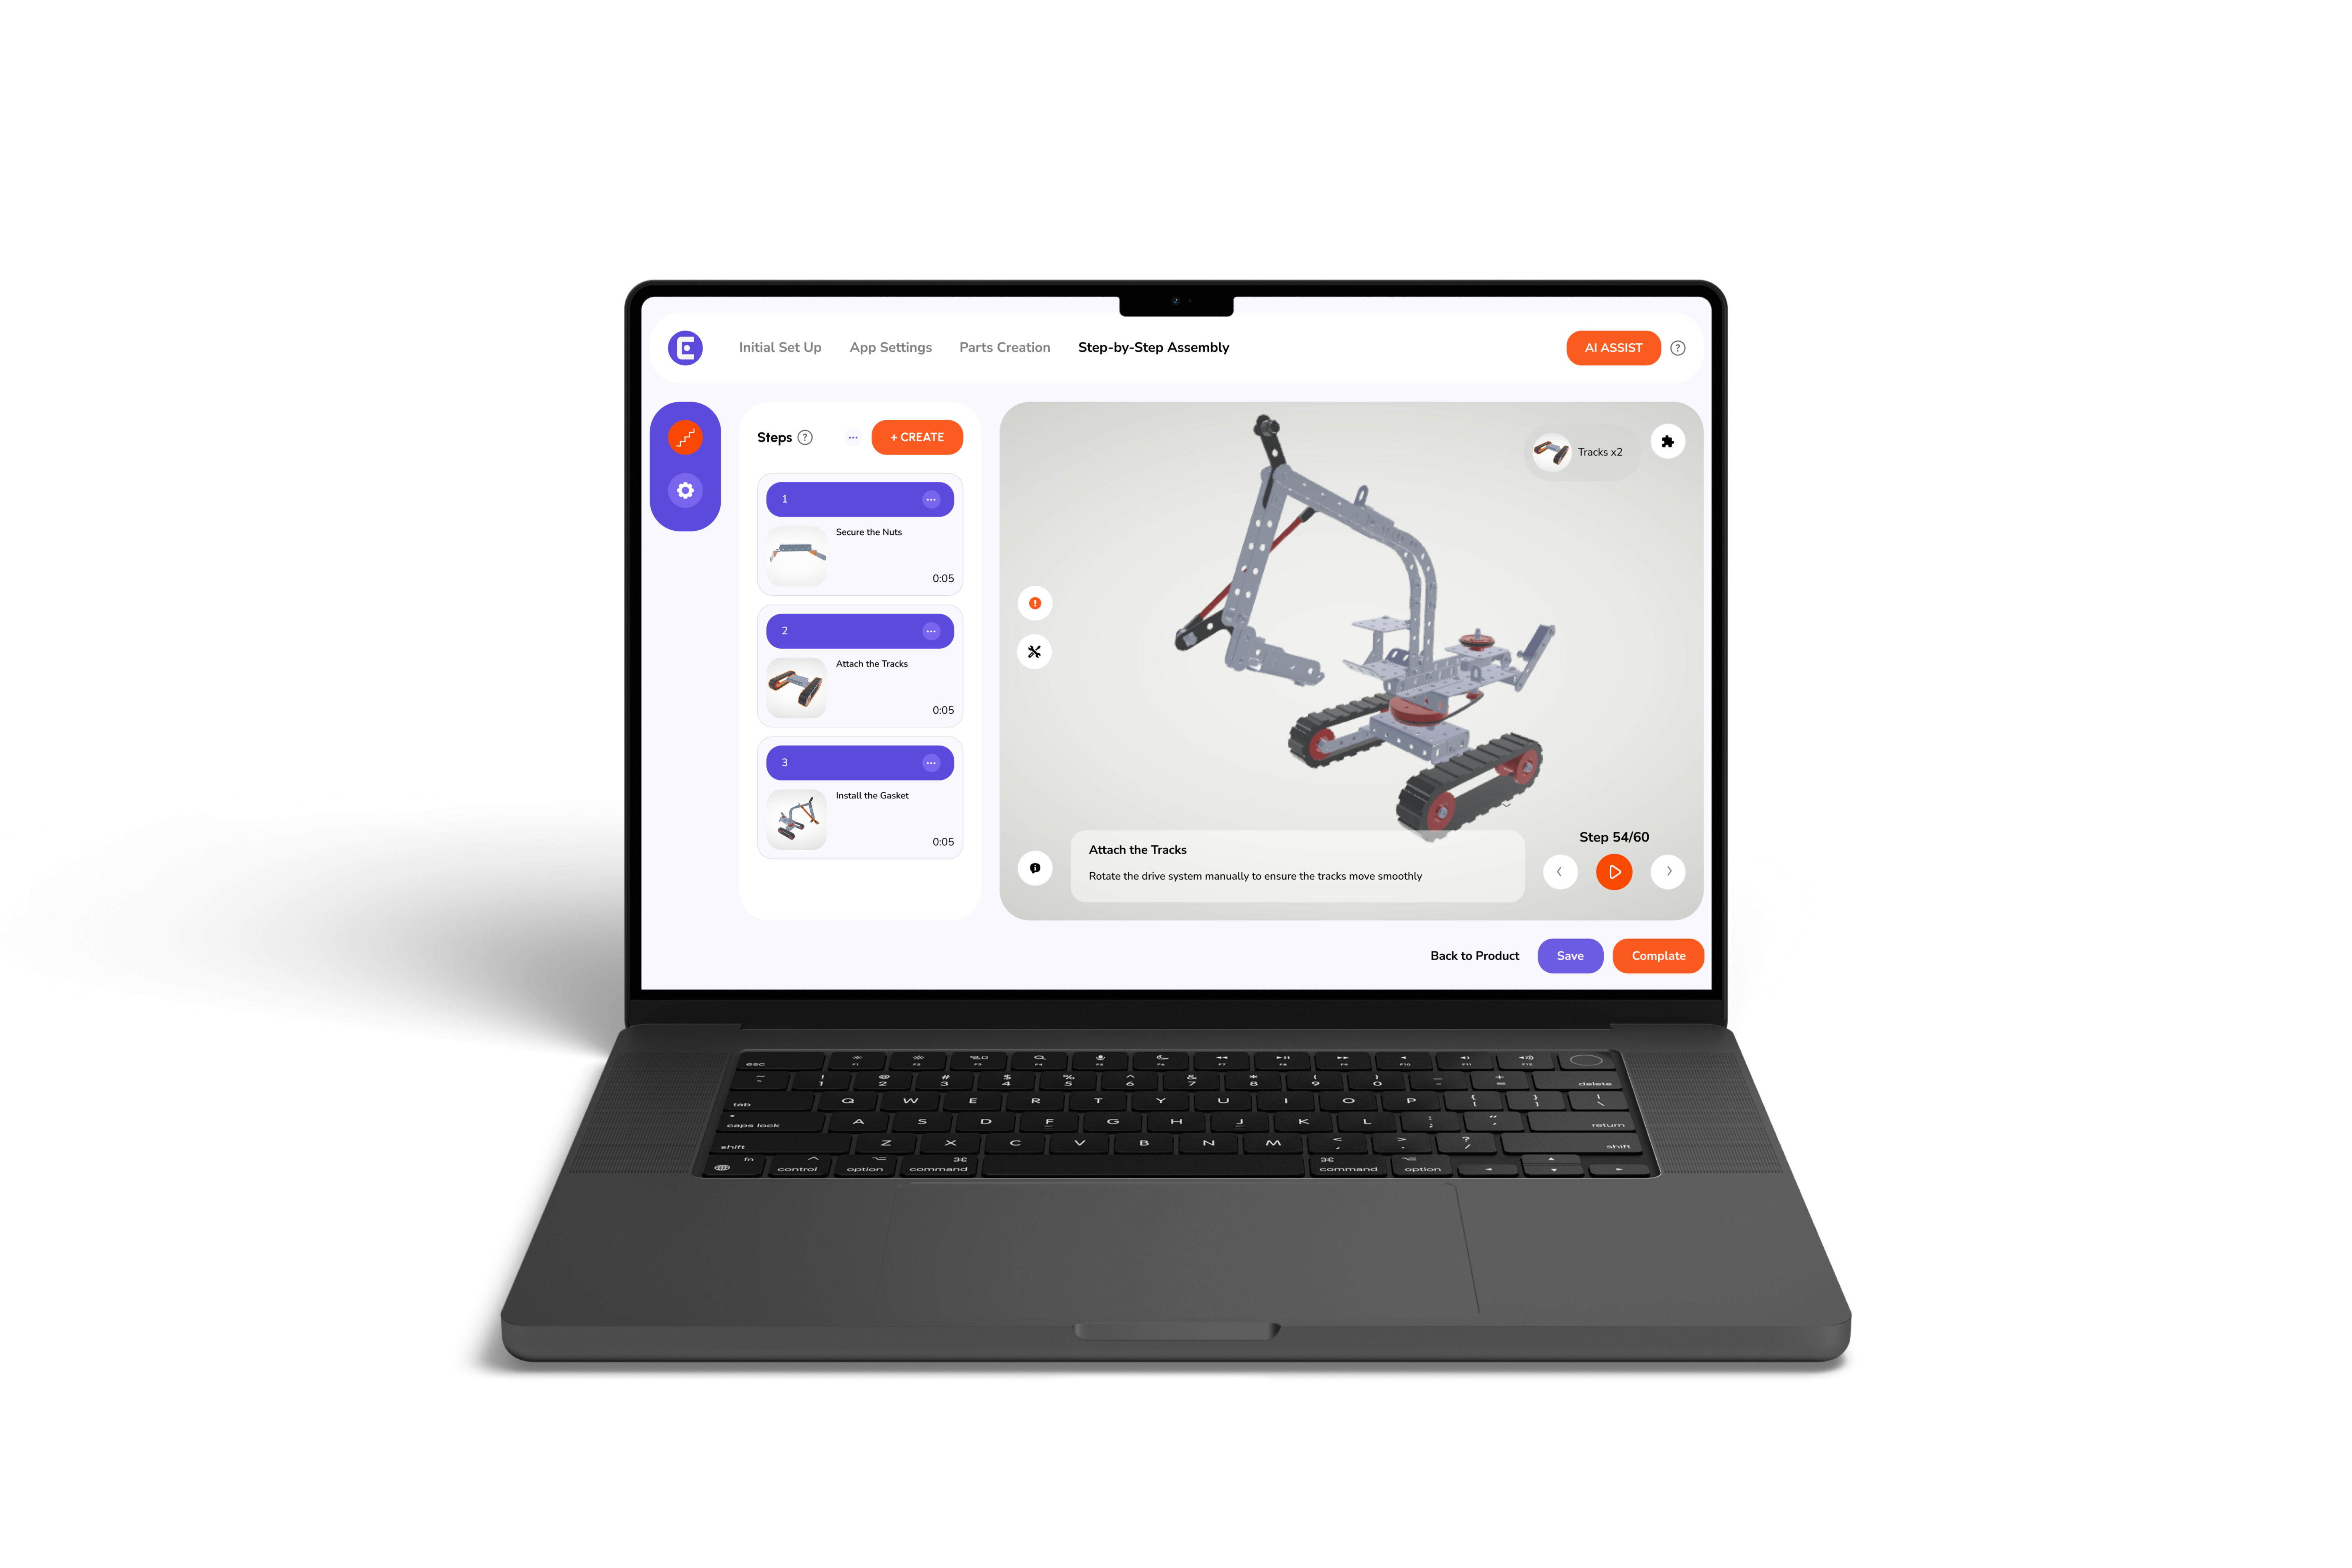
When you start assembling the pool table, ensure that all components, tools, and materials, such as the slate pieces, legs, frame, pockets, and felt, are included. However, for this purpose, you would need a pool table assembly 3D guide for the pool table assembly, from which you can visualize everything before you even begin. Therefore, the first step to do if you are wondering how to setup a pool table at home is to assemble the frame. You may start by attaching the legs to the frame and checking if the frame is in the right position. Then, you can mark the position you want the table to be in while the frame is upside down.
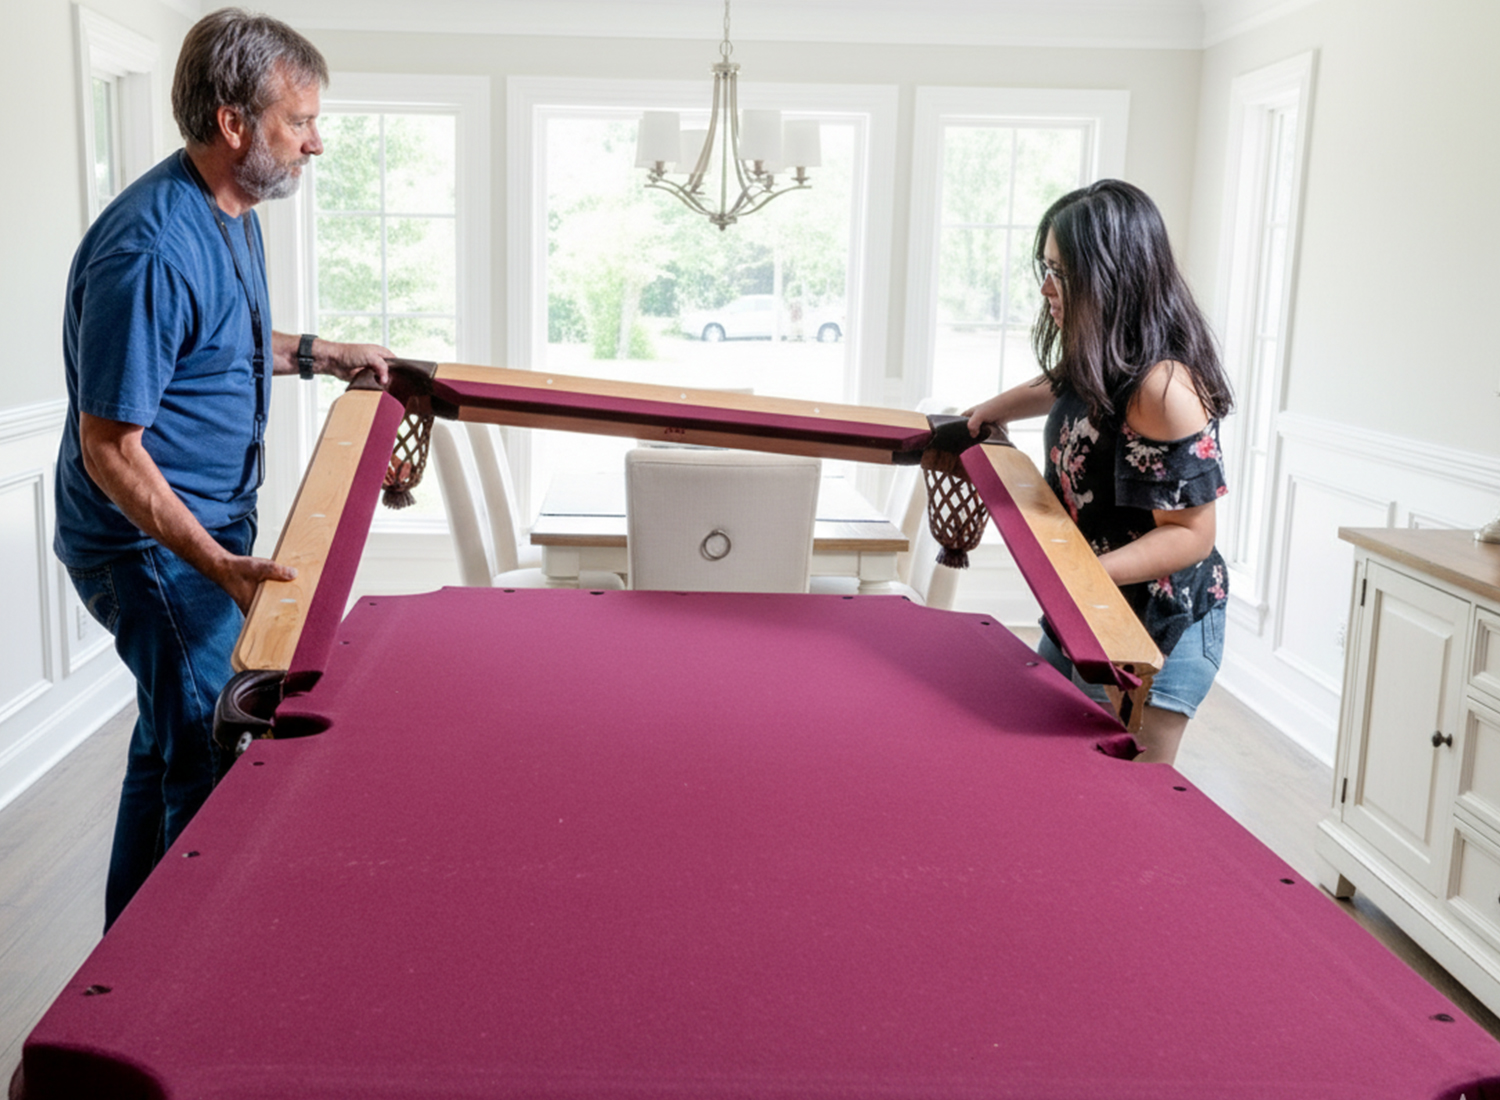
Once you've secured the legs in their place, set the slate and use screws to secure it firmly. However, ensure that the slate is on level and smooth enough before you move further. Make sure the slate is level and smooth before you move on to the next step. It is also recommended to use beeswax to join the slate pieces. You can then start by attaching the frame pieces according to your guide. Although today many homeowners prefer to assemble a pool table using 3D interactive feature, having detailed visuals and angles is important.
A 3D pool table installation guide helps you adjust the frame alignment perfectly, thus preventing damage from uneven surfaces later. Once you're all done adjusting and assembling the frame, you only need to install the felt. Therefore, it is necessary to arrange the felt to the correct size and ensure it is free of scratches or tears before installing it. Begin by placing the felt over the slate and smoothing it out. However, use a stapler to secure the felt; otherwise, you will need to stick glue around the edges. Once the felt is attached, use a trimming tool to trim the excess around the edges.
To give a proper layout or to position the slate pieces on the frame and use a level tool to ensure accuracy. This is one of the most crucial steps when you assemble a pool table, as even a little misalignment affects the game. With the frame and felt in the right position, it's time to install the rails and pockets. However, start by attaching the six rails to the frame, making sure they're level. As the rails and pockets are attached appropriately, you can test them by rolling a ball along the rails on the table. Furthermore, if the ball bounces or rolls unevenly, adjust the rails and pockets until they're straight.
Once the slate is set, you should stretch the felt tightly and attach the rails. You'll find 3D assembly instructions for sports equipment particularly essential. They show 3D animation feature and give a professional finish. Moreover, it is also essential to set the position of the table because direct sunlight, draughts, or other factors can affect its condition and long-term viability. Furthermore, if the table is uneven, it may affect how the balls roll, thus making it difficult to play; however, if the legs are not adjusted well. Adjust it first and match the ball diameter so that they fall into the pockets and not onto the floor.
The last step is to secure the pockets and then do a final investigation. However, with the interactive 3D manuals, you can easily review your progress and make precise finishing touches. With your pool table setup guide, it's time to test it out. Moreover, try testing the table by rolling some balls around or simply gaming. Therefore, if you notice any issues, such as balls rolling unevenly or pockets being too loose, adjust them until everything is perfect. Lastly, the only step is to set the rules for the table to help preserve the integrity of the felt.
Modern homeowners expect clarity and convenience. The integration of interactive instruction manuals and 3D pool table installation guides represents the future of sports equipment assembly. Whether you're setting up a treadmill, basketball hoop, or pool table, or if require to assemble a pool table with 3D Instructions to ensure accuracy . So, if you're planning to assemble a pool table at home, skip the frustration of text-heavy booklets. Furthermore, use innovative digital resources to save time, reduce errors, and achieve perfect results.
{{sports}}
Learning how to assemble a pool table doesn't have to be complicated. With the right tools, guidance from digital assembly solutions provider, you can assemble a pool table quickly, accurately, and stress-free. By relying on 3D assembly instructions for sports equipment assembly and partnering with a digital assembly solutions provider, you'll transform your setup experience from overwhelming to effortless. Whether it's your first time setting up or you're refining your game room, remember, it's not just about putting parts together. It's about building precision, stability, and lasting enjoyment every time you assemble a pool table.